There are plenty of advantages to having an above ground pool. They’re not as permanent, they generally require less work than in-ground pools because they tend to be smaller in volume, and they’re less expensive than their in-ground counterparts.
But they also have their downsides. For one, they’re a bit more difficult to get in and out of since you have to climb a ladder. Without a deck, your guests are walking straight from the yard, up the ladder, and right into the pool, bringing with them whatever muddy mess they just walked through.
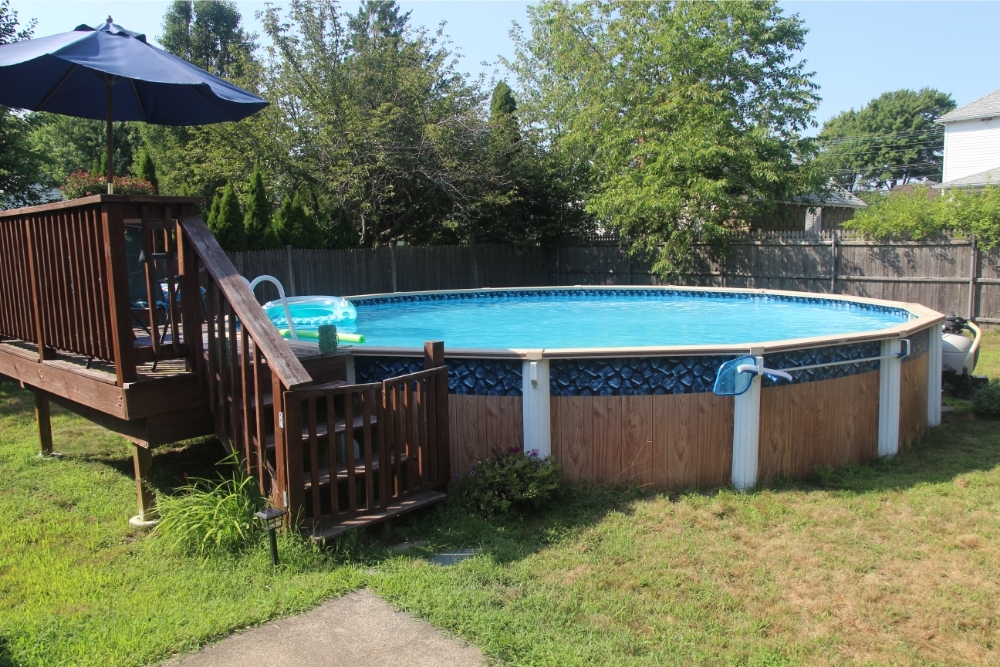
Weather conditions and all the splashing means it can get very muddy around an above-ground pool. However, building a pool deck is a simple way to upgrade your above-ground pool.
How to Build a Pool Deck
Framing the floor: The floor framing around the pool consists of 18 trapezoidal floor-joist frames. These are 4 frames with two parallel sides and two sides that angle toward each other. Begin by using 2x6s to build 17 identical frames. After the other frames are assembled around the pool, you can build the 18th frame to fit around the others.
To get the job done quicker, use galvanised-metal corner brackets to attach the four perimeter boards. Then use joist hangers to install the center support joist.
Setting piers and posts: The floor-joist frames are supported by 4×4 posts set in concrete pier blocks. Set the first pair of blocks directly onto the ground beside the pool. You don’t have to remove any grass to do this, but you can use a shovel to level the ground out if it’s uneven. Position the first pier block so its center is 12-inches from the pool wall. Then place the second pier farther away from the pool with its center 18-inches from the center of the first.
Now you can stand the two 4×4 posts in the square sockets molded into the piers. Lay a 4ft level across the top cap of the pool (the coping) and mark a level line across the 4x4s. Then remove the posts and measure down from each line a distance equal to thickness of the coping, plus another 1½-inches for the 2×6 decking, 5 ½ inches for the floor frame, and ½ an inch for expansion.
Make a mark on each post and cut them to length. Now you can put the posts back onto the piers in their original positions. Repeat this for the next pair of piers and posts. You can use one of the assembled floor-joist frames to position the pier blocks.
Once the second pair of posts is cut to size, set them into the piers and place a floor-joist frame on top. Drive 2 ½ inch deck screws down at an angle through the frame and into the tops of the posts. Continue setting pier blocks, posts and frames around the pool. After installing the 17 assembled frames, measure and cut the last one to fit the space that is left.
Complete the pool-deck frame by screwing 2×4 diagonal braces to the 4×4 posts. However, bracing is not needed if the desk is less than 30-inches high.
Now you can set the pier blocks and posts for the 10×18-ft sun deck. The 42 piers are arranged in 11 rows spaced 24-inches on center. Once the posts are cut to size and set in the piers, install the 2×6 floor joists. Fasten the joists by using 2 ½-inch deck screws and screwing them down at an angle into the tops of the posts.
Laying the decking: A common technique for decking around a circular pool uses tapered boards. This is so they all radiate from the center of the pool. However, this technique calls for cutting several 2x6s into 4-ft lengths with one end cut at 80° instead of square. Slip the angled end of the first decking board under the pool’s coping, at least ½ an inch away from the pool wall.
Set the long edge of the deck board directly on the joint running between two adjoining floor-joist frames and fasten the board to the joists with 2 ½-inch deck screws. Then lay the next board flush against the first one and screw it in place. You’ll notice a ¼-inch gap between the boards when they shrink.
Continue installing the deck boards in the same way, with the angled end slipped under the coping until you reach the next floor-joist frame. Lay a deck board in place and mark where the joint between the two frames overlap.
Cut the board along the line and screw it in place, and trim the next two boards in the same manner before installing full-length boards again. Once they’re all fastened down, trim off their overhanging ends with a circular saw so they’re flush with the perimeter joints.
Now you can move onto the sunk deck and start fastening down the 2×6 boards. Butt the boards tightly together again and let them run along. Next, snap a chalkline and trim the boards flush with the joists.
Building the guardrails: Using pre-cut railing posts saves a lot of time. Install a post at every joint where two floor-joist frames meet. Then fasten each one with two ⅜ inches in diameter x 4-½-inch long galvanized lag screws.
Now you can make the horizontal rails that span between the posts by cutting a 10° bevel on the ends of a 2×6. Slip the board between two posts and fasten it with 2 ½-inch deck screws. Then cut a 2×4 to length and screw it to the top of the corresponding rail to act as a cap.
Next, enclose the open space under the railing with 2×2 pre cut balusters with one end beveled to 45°. Hold each baluster precisely then screw it to the 2×6 railing and to the floor joist. Set the balusters 4-inches on center with the beveled ends facing down.
Finally, you can build the stairs that lead from the deck down to the ground. To make this simpler, use five pre cut stair stringers and set the bottom ends of the stringers on concrete patio blocks. This prevents them from sinking and wicking up moisture. Screw the upper ends of the stringers to the floor joist. You can create the stair treads by screwing 2x12s to the stringers.
")
")
 - Everything You Need To Know")
?")
")
?")
")
")